Embed Configuration
Configure your embedded editor settings to match your brand and control user permissions. Access these settings in your Templated dashboard under Embed Setup.
Basic Configuration
Section titled “Basic Configuration”Domain Settings
Section titled “Domain Settings”Control which domains are allowed to embed the editor.
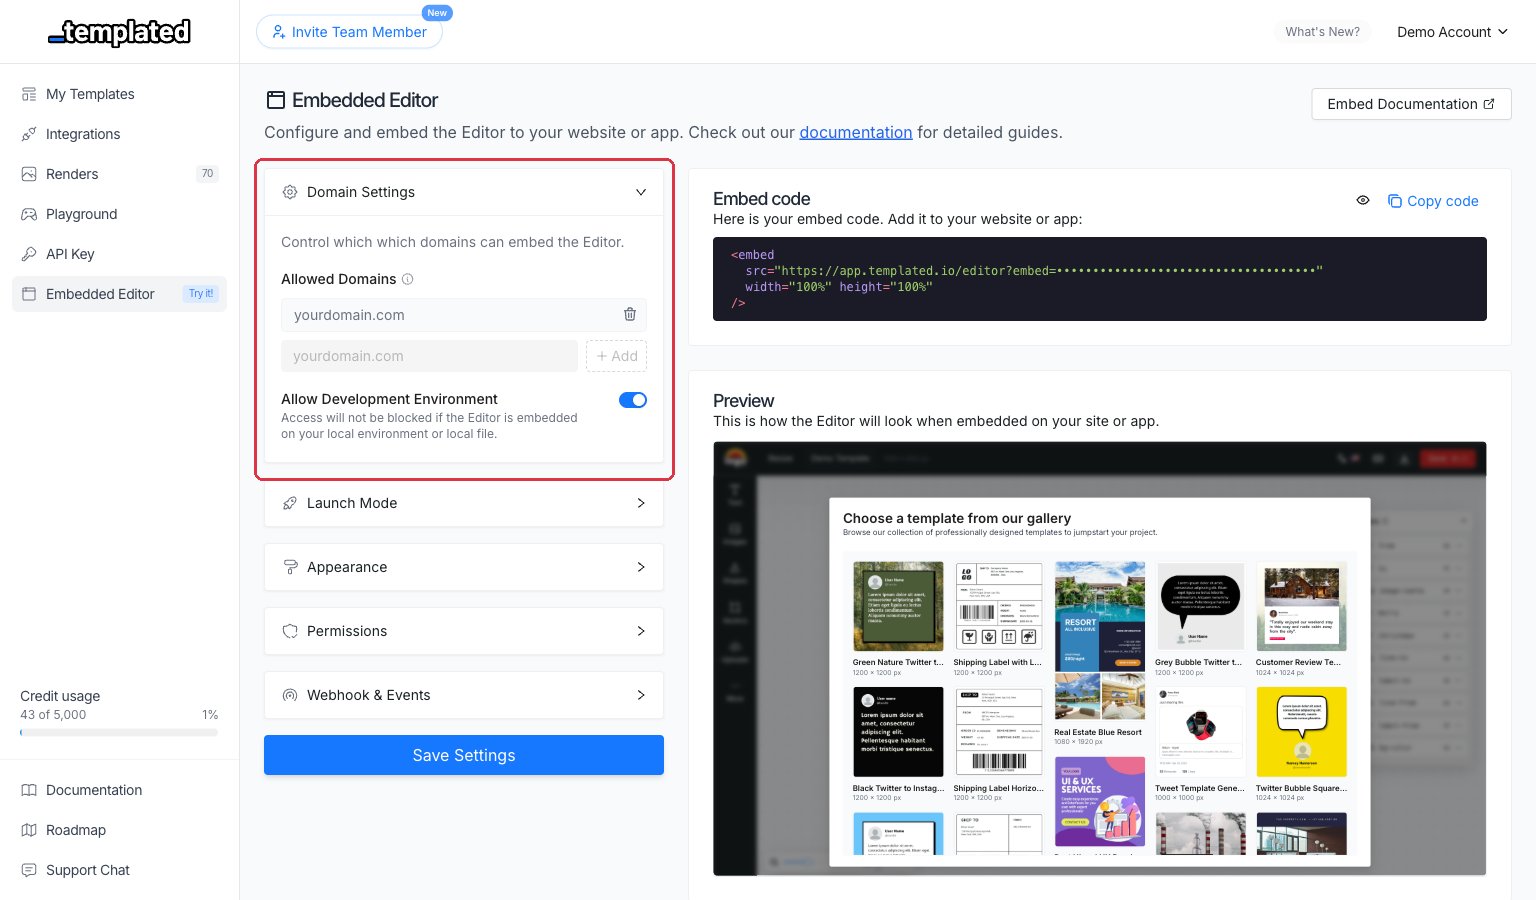
Domain
The domain where your embed will be displayed. Must include protocol (https:// or http://).
Allow Development Environment boolean
Enable this to test the embed on localhost or local development environments.
https://yourdomain.comBranding
Section titled “Branding”Customize the look and feel of the editor with your branding.
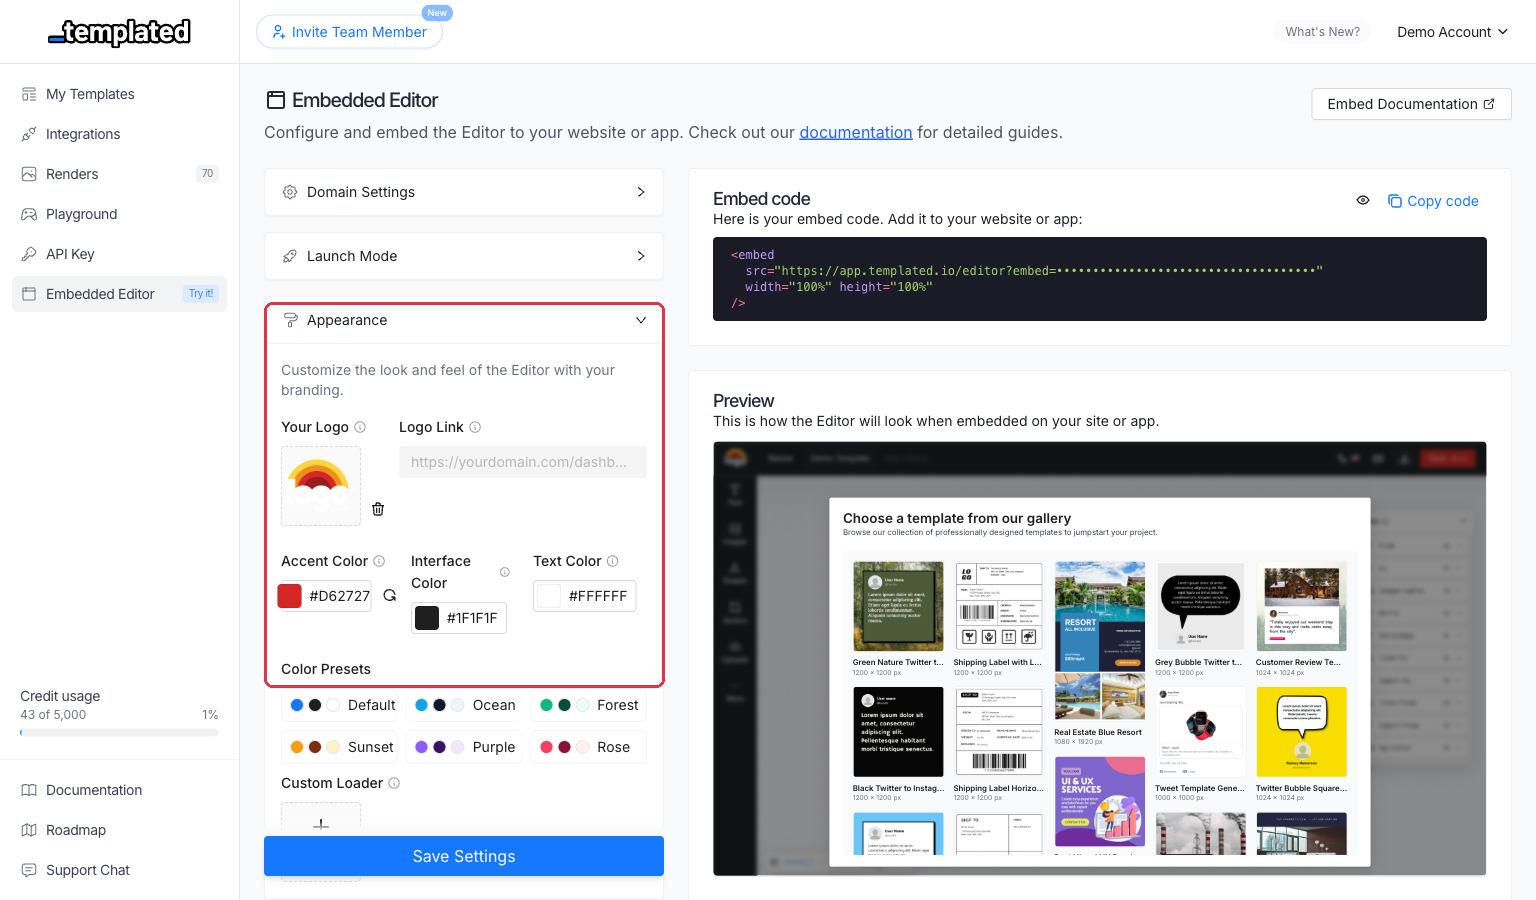
Logo URL
Your company logo displayed in the top-left corner. Ideal size: 100x100px. Supports PNG, JPG, and GIF.
Logo Link
Optional URL where users are redirected when clicking your logo. Must start with https:// or http://.
Accent Color
Hex color code for buttons, links, and interface elements. Default: #1677ff.
Custom Loader
Custom loading animation while the editor loads. Ideal size: 128x128px. Supports GIF animations. Default: Templated’s default loader.
Logo URL: https://yourdomain.com/logo.pngLogo Link: https://yourdomain.com/dashboardAccent Color: #FF6B35User Permissions
Section titled “User Permissions”Control what actions users can perform in the embedded editor.
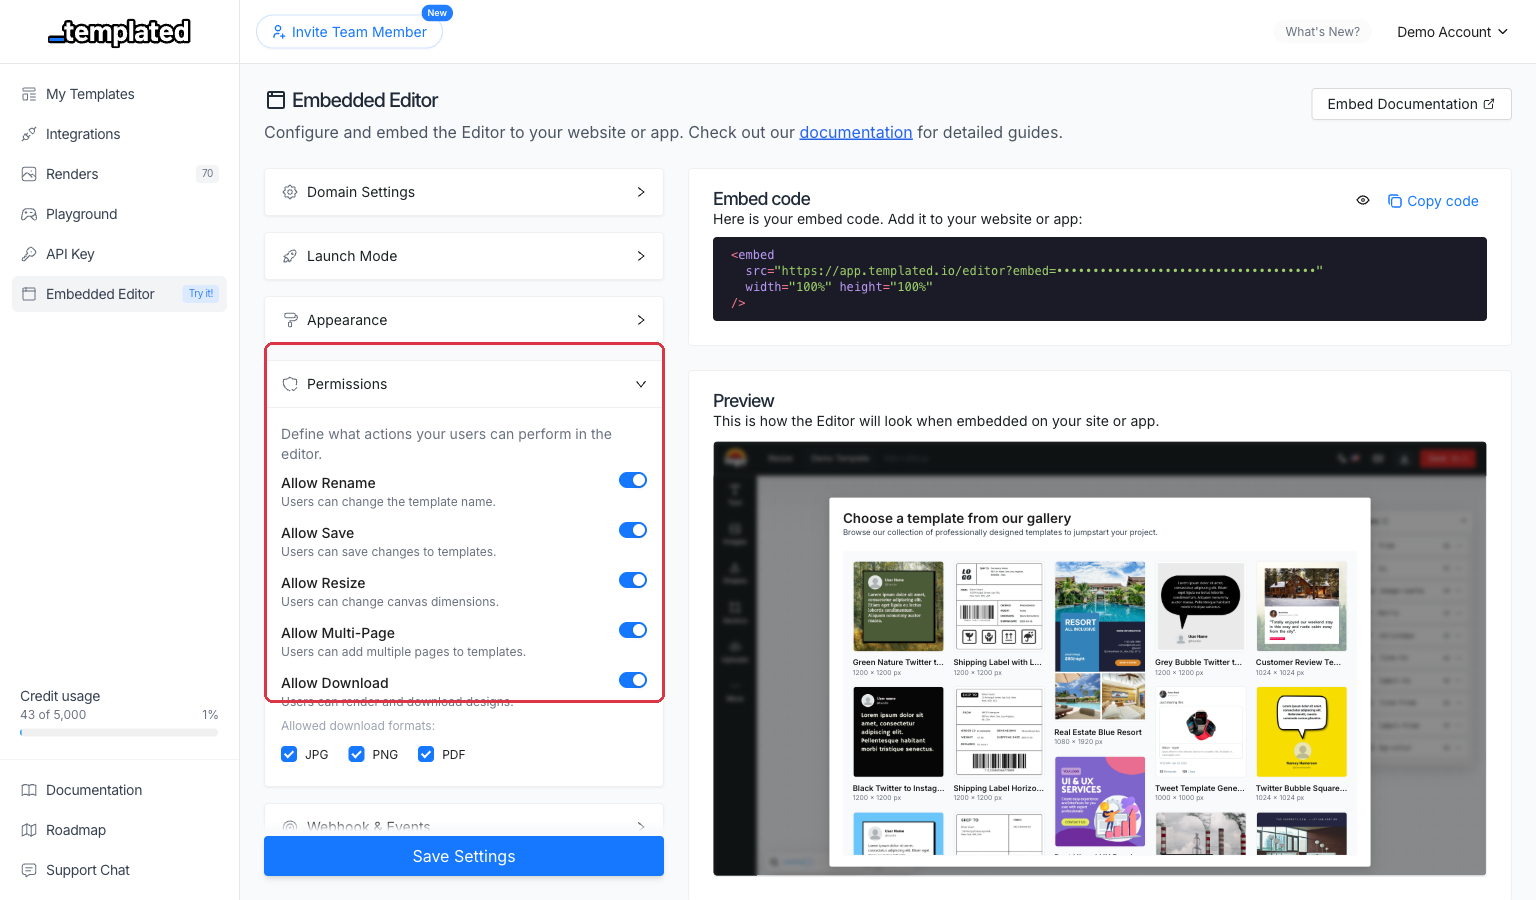
Basic Actions
Section titled “Basic Actions”Allow Rename
Let users change template names. Default: true.
Allow Save
Enable the save button for users. Default: true.
Allow Resize
Allow users to resize templates. Default: false.
Download Options
Section titled “Download Options”Allow Download
Enable download functionality. Default: true.
Download Formats
Available formats when download is enabled. Options: JPG, PNG, PDF, MP4.
Layer Permissions
Section titled “Layer Permissions”Allow Layer Move
Let users move layers around the canvas. Default: false.
Allow Layer Resize
Enable resizing of individual layers. Default: false.
Allow Layer Select
Allow selecting layers. Default: false.
Allow Layer Unlock
Allow users to unlock locked layers. Default: false.
Allow Layer Rename
Enable renaming of layers. Default: false.
Allow Text Edition
Allow double-click text editing. Default: false.
Template Management
Section titled “Template Management”Allow Create Template
Enable creating new templates from the editor. Default: true.
Launch Modes
Section titled “Launch Modes”Webhook Integration
Section titled “Webhook Integration”Testing Your Configuration
Section titled “Testing Your Configuration”Enable development mode to test on localhost
Copy your embed code from the dashboard
Test all permissions you’ve configured
Verify webhook delivery if configured
Check branding appearance matches your design