· Tutorial · 7 min read
Automate Open Graph Image Generation with Templated in 5 Minutes
Learn how to automate Open Graph image generation with Templated in under five minutes. Create a reusable template, populate it from a spreadsheet, and generate dozens or hundreds of branded OG images automatically without coding or design work.
Open Graph images are one of those details people usually ignore until they share a link and realize the preview looks terrible. A missing or poorly chosen image can make a page look unfinished, and many websites still skip them because creating a separate graphic for every URL takes extra time.
I'm Pedro, the founder of Templated. I also recently launched a new product called Supapin for Pinterest automation. So I've been spending a lot of time reviewing the site and polishing the small details before scaling it further.
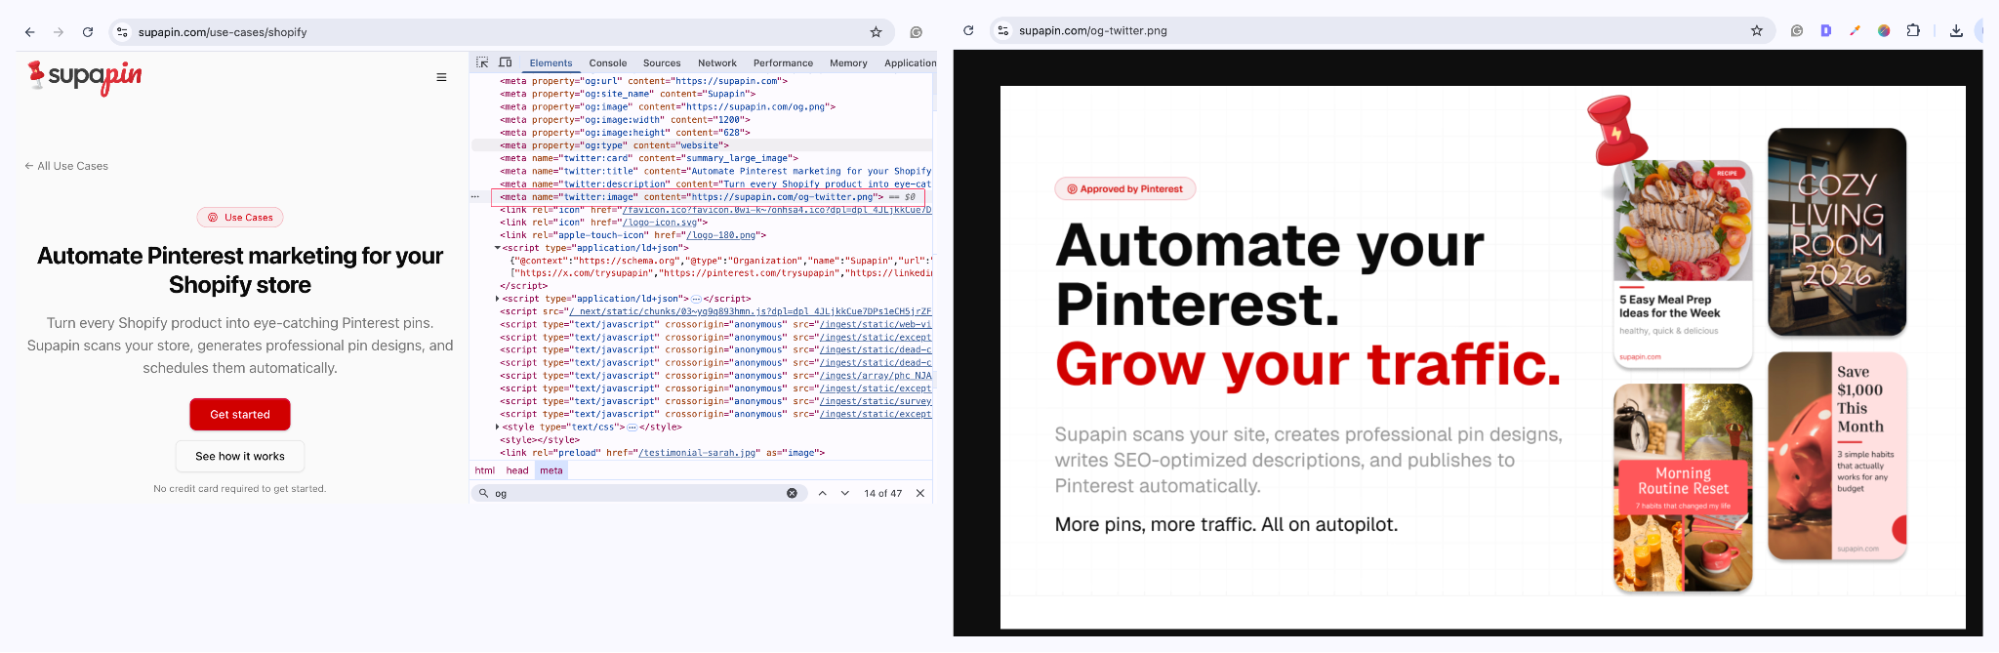
While checking one of the use case pages, I opened the Open Graph metadata and realized something I had missed. The page was still using the default site-wide OG image instead of a dedicated image for that specific use case. As a result, every page shared the same preview, even though the content behind each URL was completely different.
That was enough for me to stop and fix it properly. And, I decided to automate the entire workflow with Templated and generate one for every use case page.
The whole setup, including building the template and generating the images in bulk, took less than five minutes.
In this tutorial, I'll show you exactly how I did it.
By the end, the Supapin use case pages will have their own custom Open Graph images instead of relying on a generic default, and you can use the same approach for your own site with only a few minutes of work.
Prerequisite: Create an account on Templated before you begin. That's really the only requirement. For this workflow, you don’t need to use any library, connect to a no-code platform, or set up any external automation. As long as you know what you want to automate and have a rough idea of the design you want to generate, you're ready to follow along.
Step 1: Create Your OG Image Template
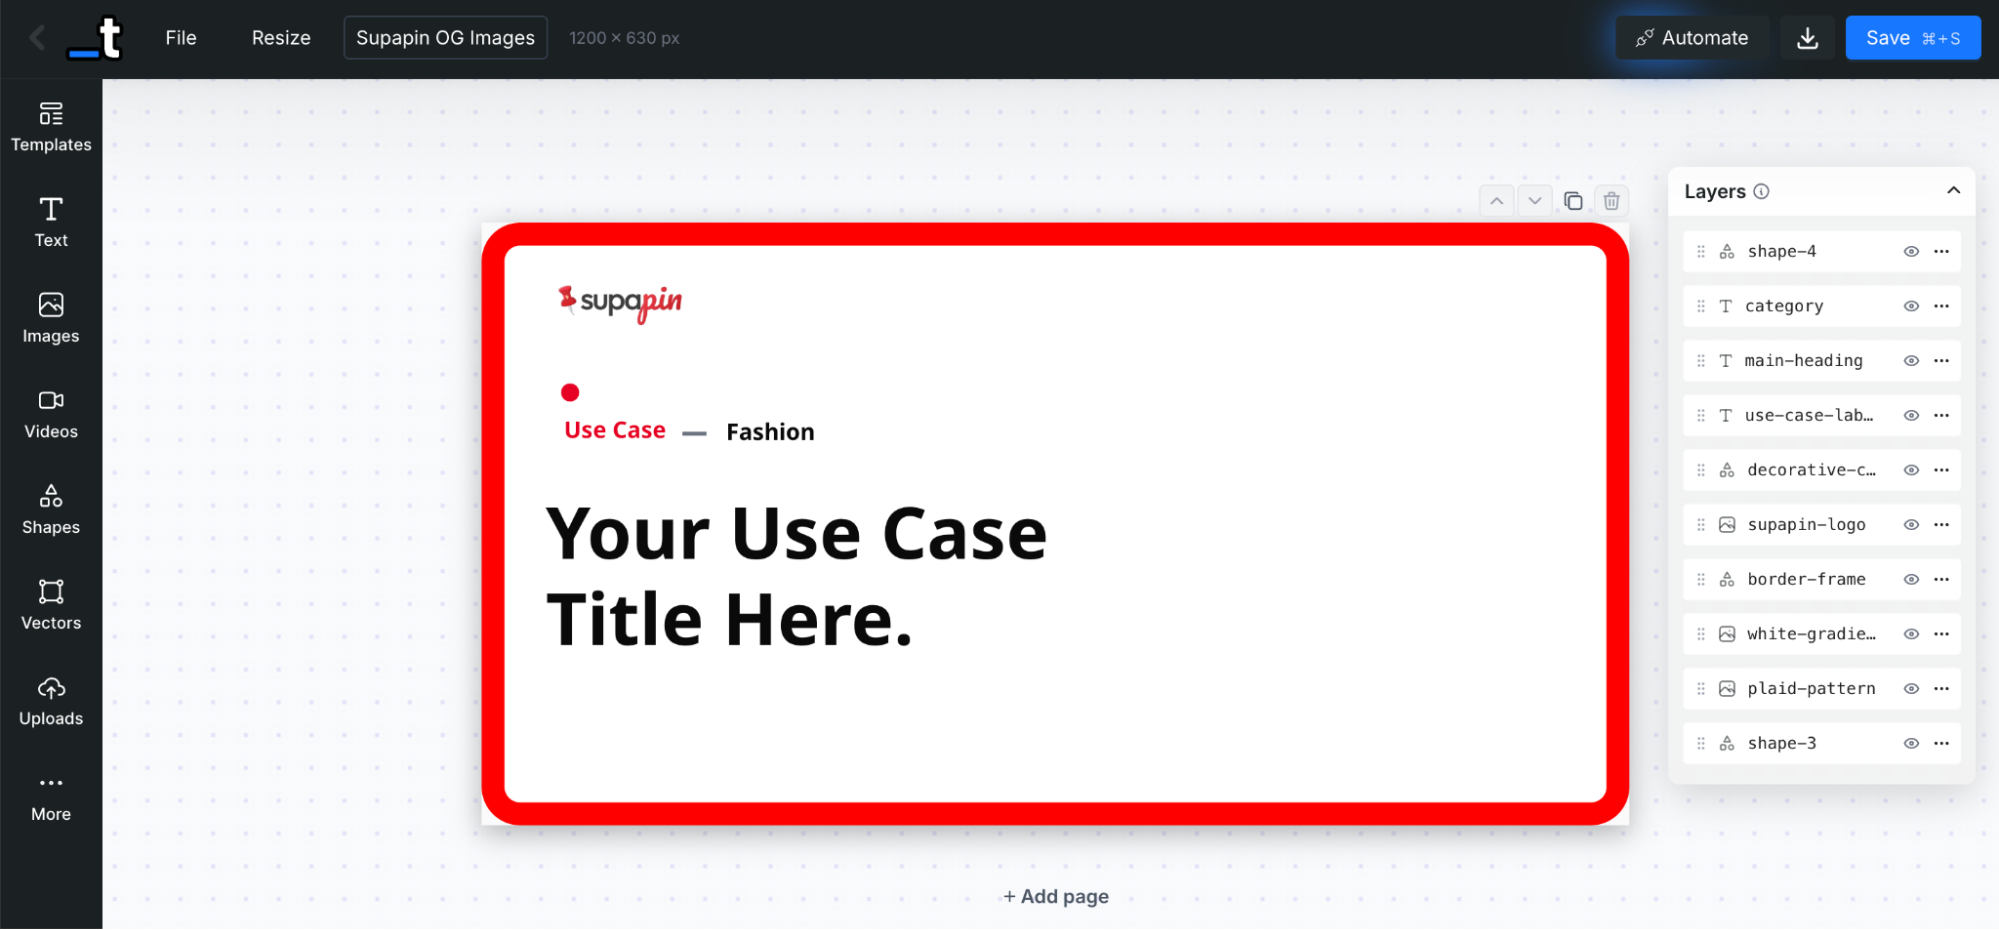
The first step is getting the design ready. I built mine directly in the Templated editor, but you can just as easily import an existing design from Canva if you already have one.
For this example, I kept things intentionally simple. I added a border with the shape tool, adjusted a few colors, positioned some text, and placed everything so the layout stays clean even when the title changes. The whole template only took a couple of minutes to put together.
If you've already designed an Open Graph image in Canva, you don't need to start from scratch. Just import it from Canva using the public view link. Templated brings in the layers, so you can edit the imported design the same way you would with one created natively in the editor.
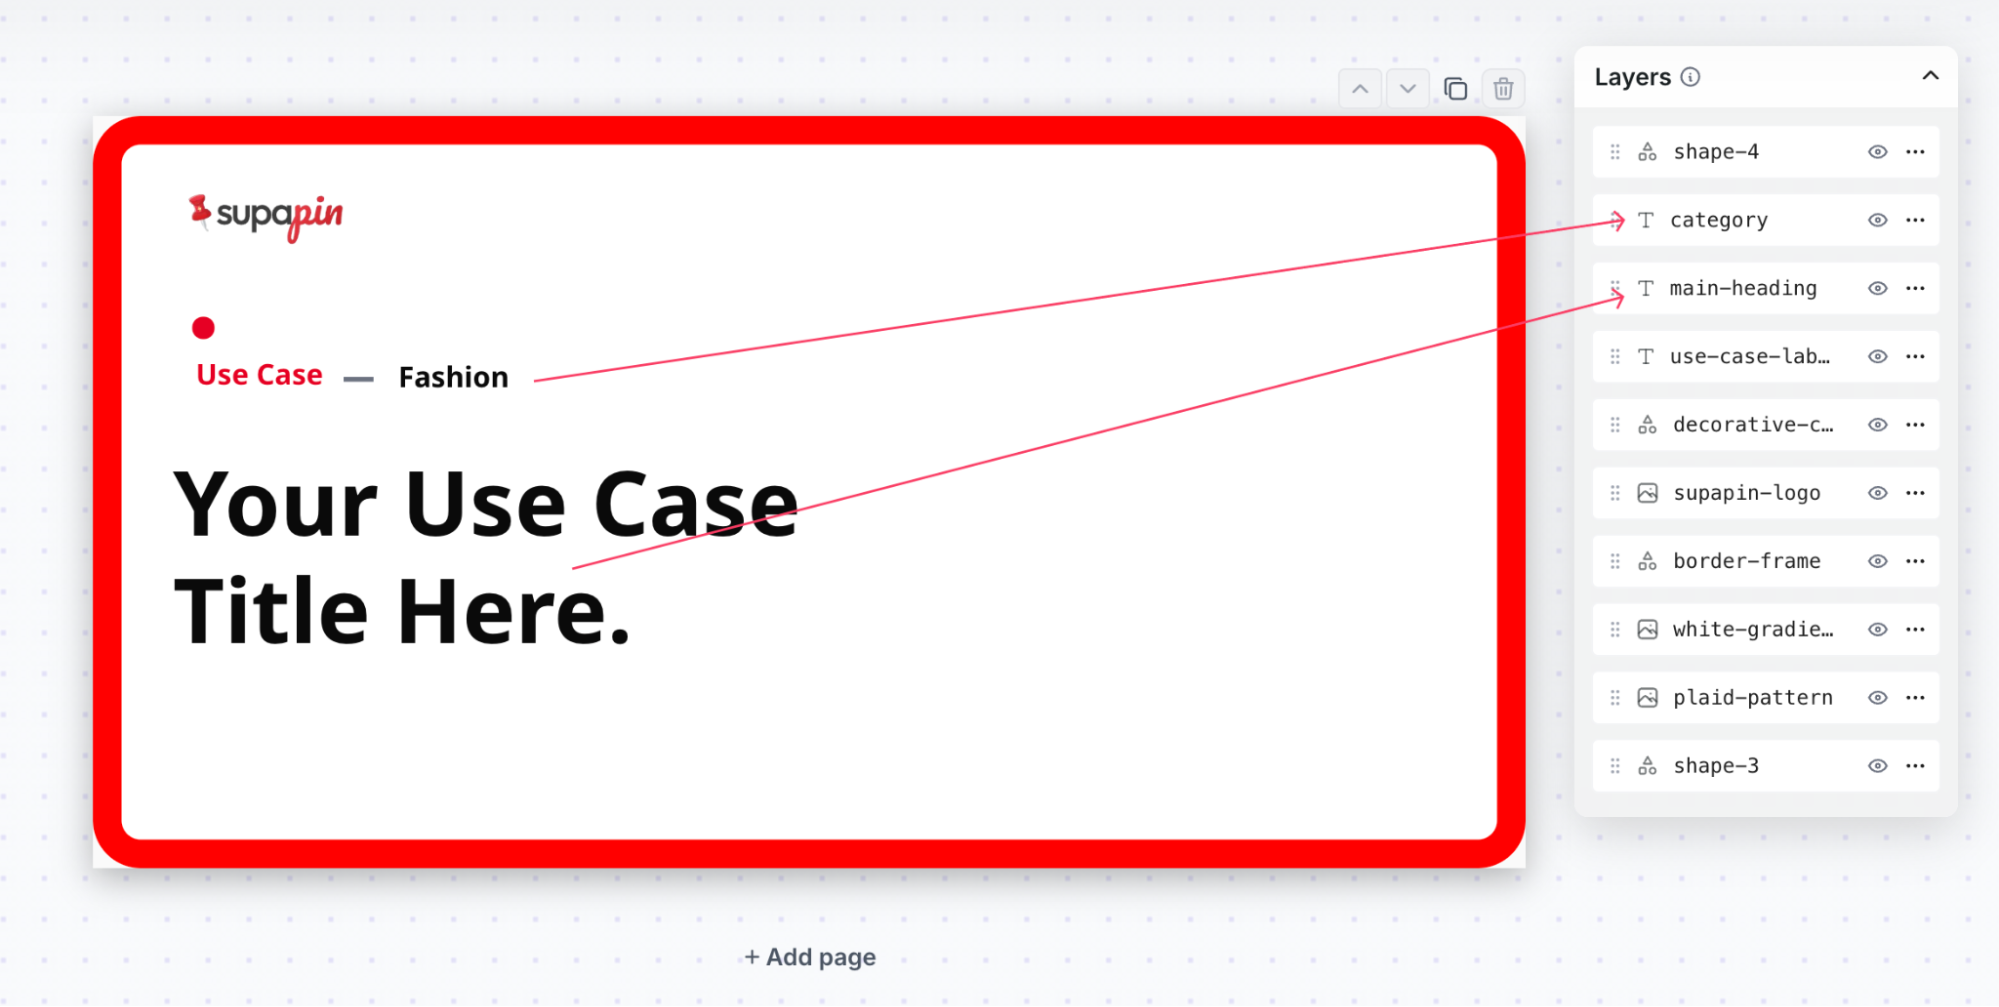
Once the template is ready, take a look at the layer list. My design has several layers, but only two of them need to change for each generated image:
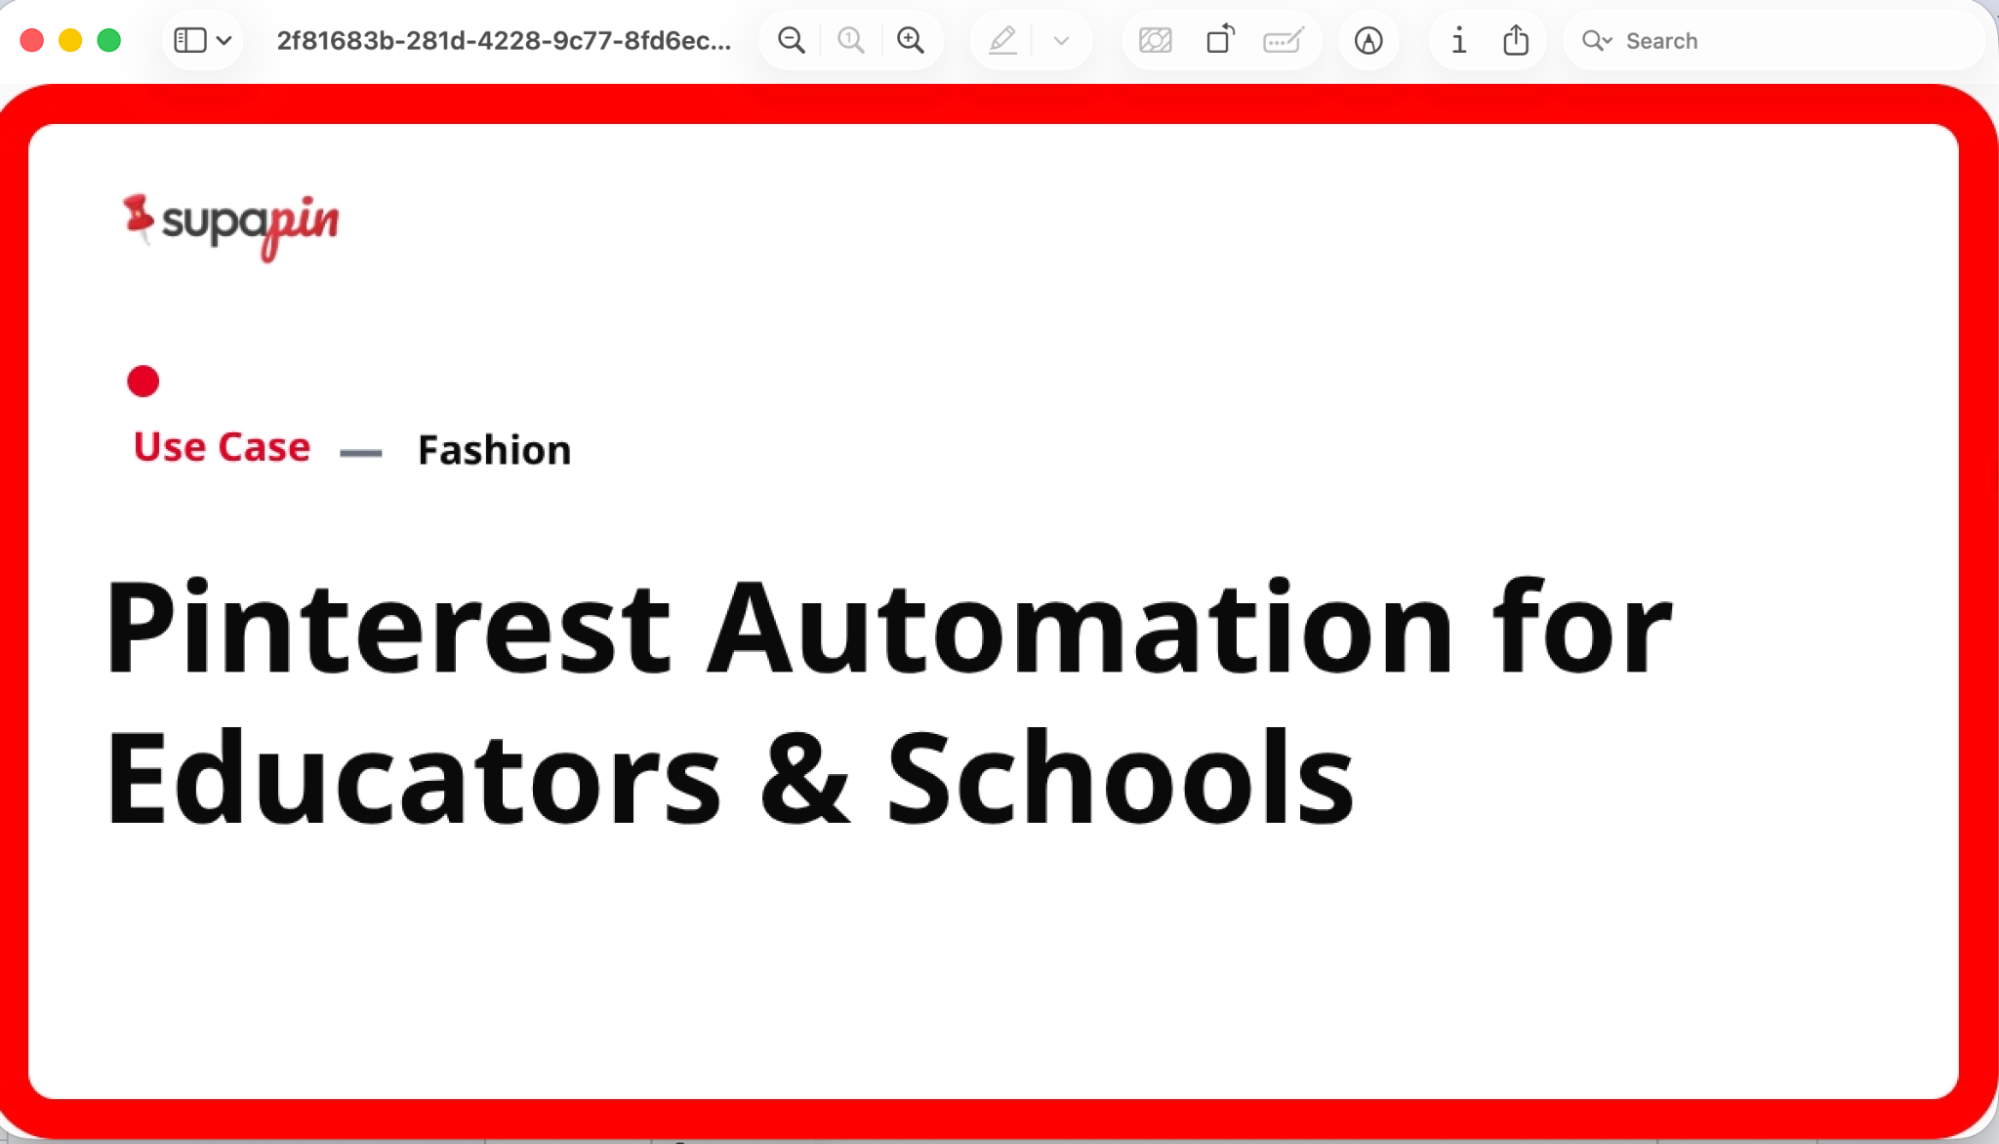
The category label. In this example, it's set to "Fashion", and I want that value to update automatically.
The main title will also be populated from my data source.
Everything else stays fixed. That's the advantage of using a template. You only replace the content that varies while keeping the branding and layout consistent across every generated image.
I also recommend giving those editable text layers clear names before moving on. Renaming them makes it much easier to map data later and avoids confusion when you're generating images in bulk.
With the design finished, the next step is building the data source that will feed those two fields.
Step 2: Prepare the Spreadsheet for Bulk Generation
With the template finished, the next step is preparing the data that will drive the image generation. This part looks more complicated than it really is. In my case, it took about two minutes from start to finish.
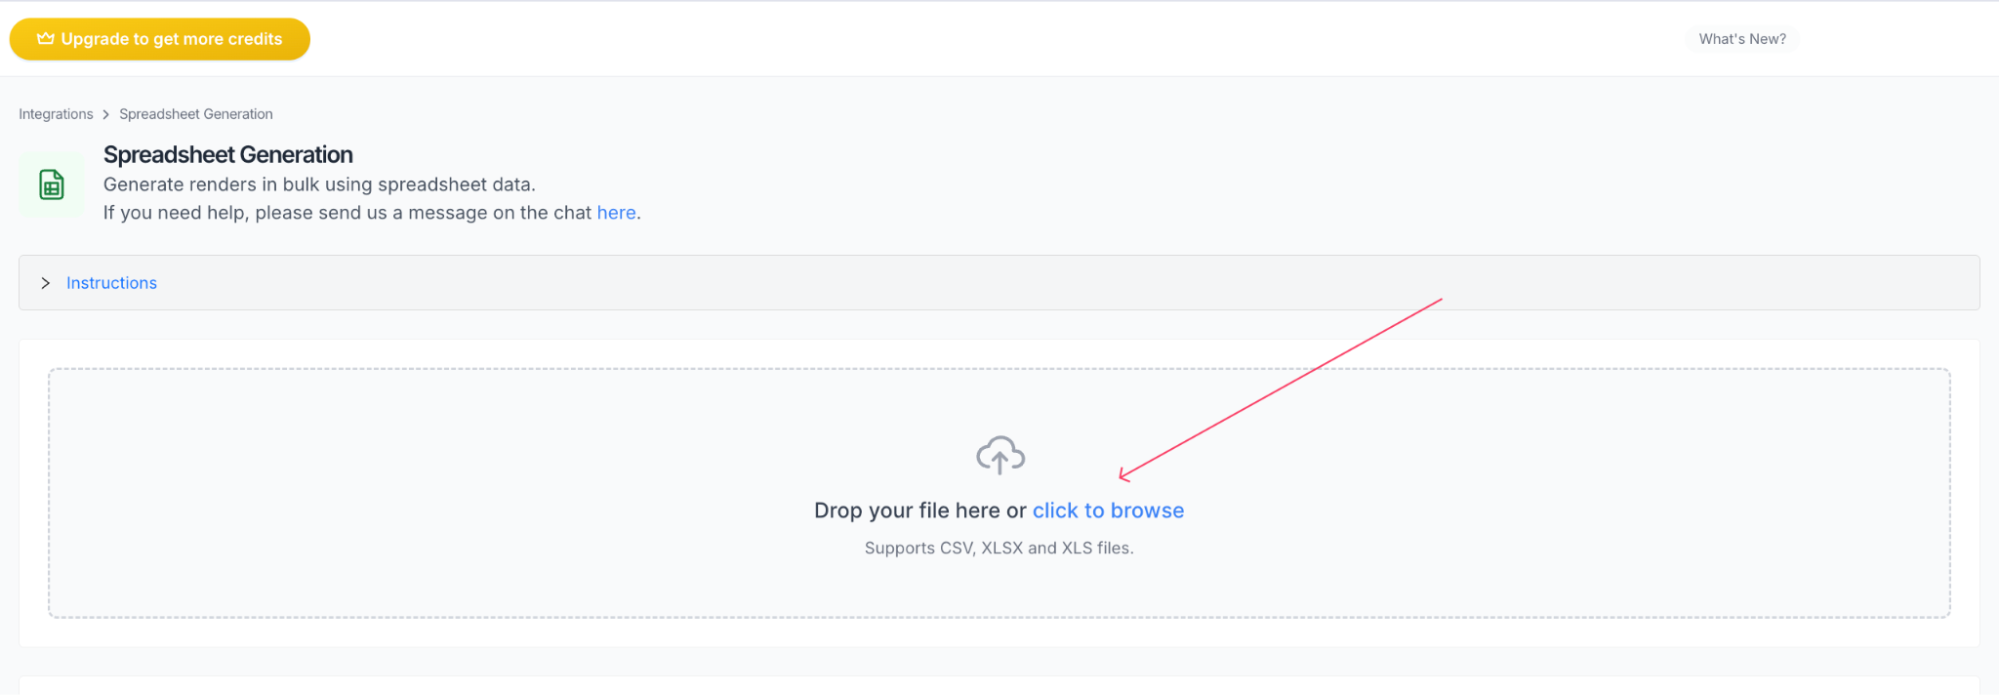
Head over to Integrations in the Templated dashboard and open Spreadsheet Generation. Before creating your sheet, spend a minute reading the instructions on that page. The format is intentionally simple.
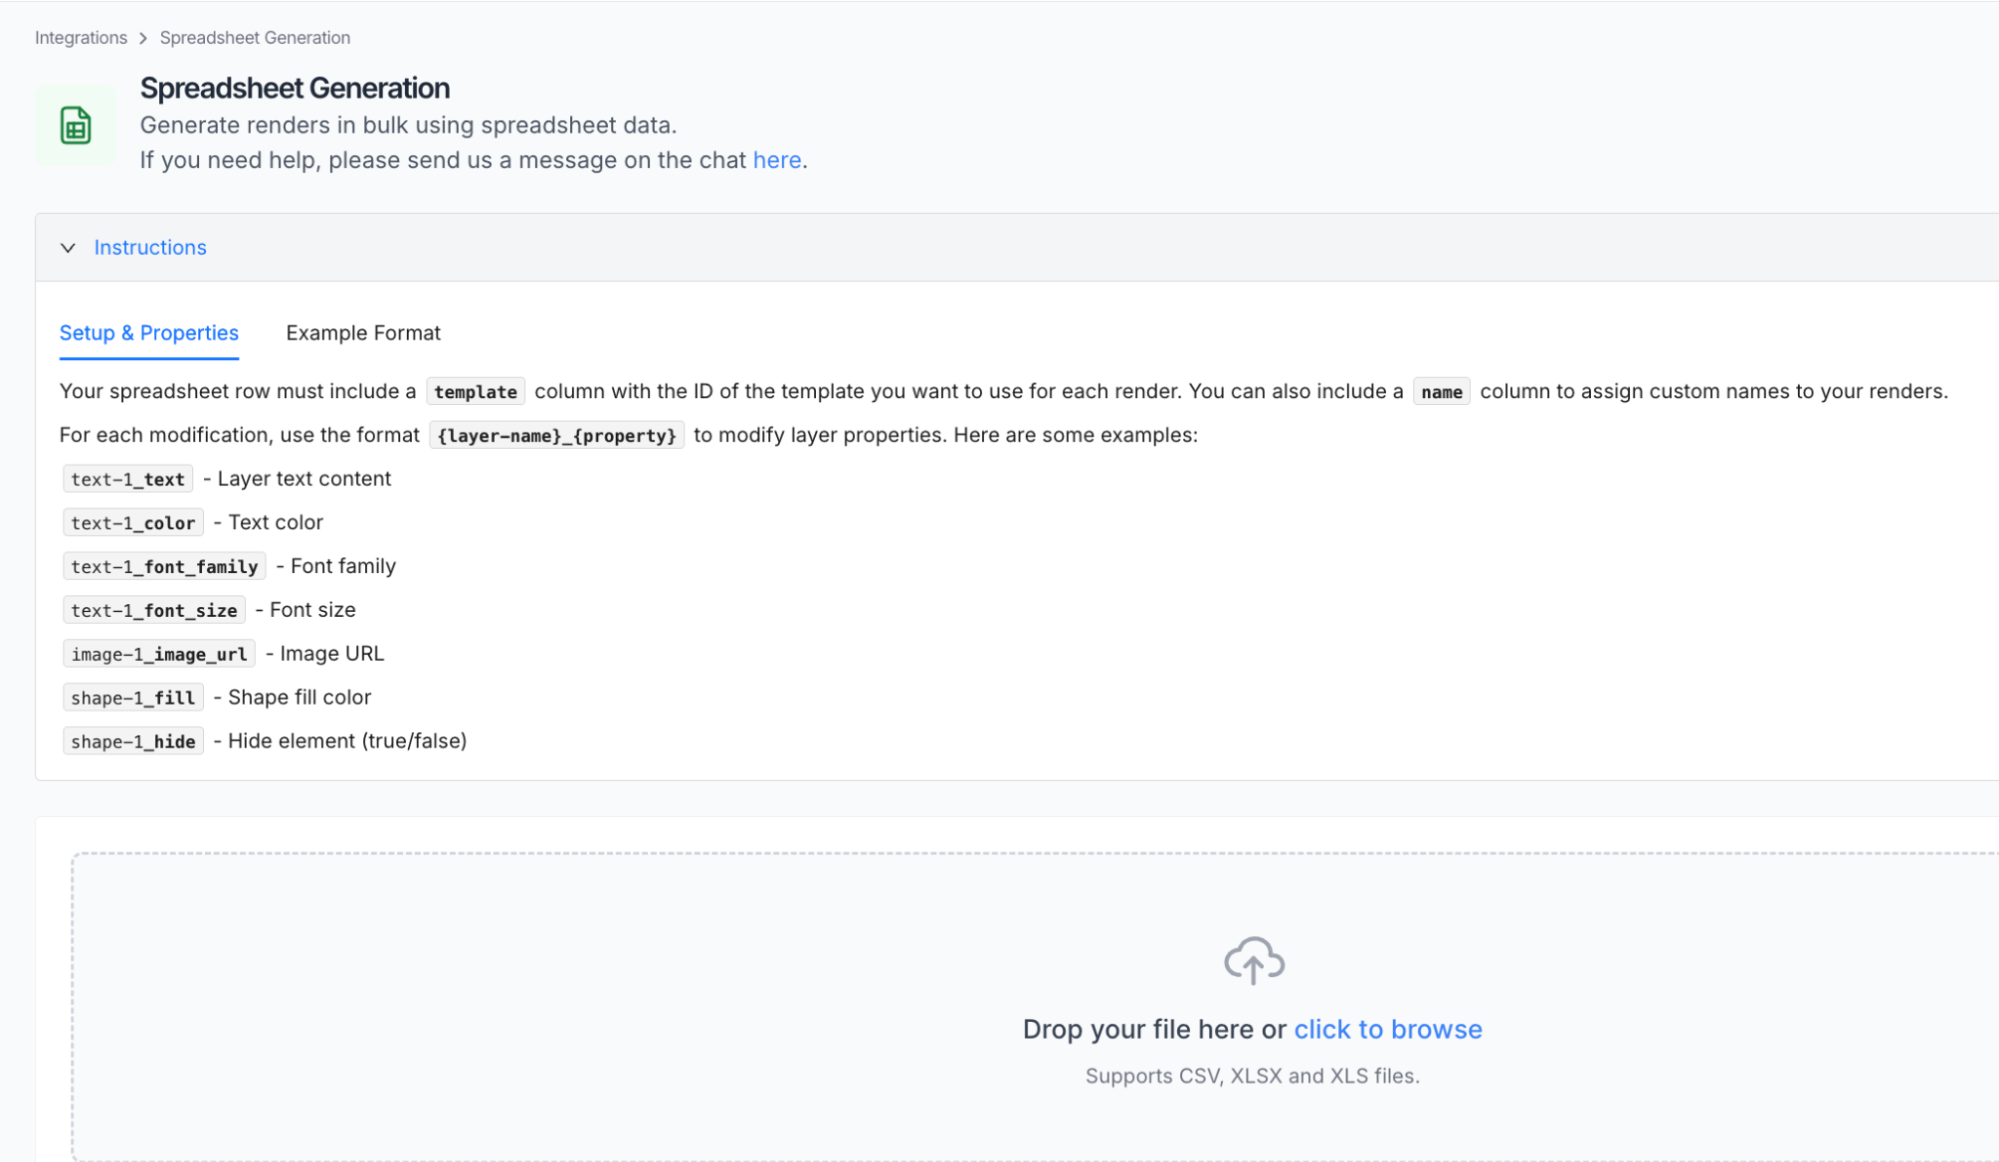
The first requirement is a template column. Every row needs the ID of the template you want to render. After that, you create columns that match the editable layer names in your design. Since I renamed my layers to main-heading and category-label, I added main
-heading_text and category-label_text as spreadsheet columns. Templated automatically maps those values to the corresponding text layers when generating each image.
The screenshot below shows the spreadsheet I used for the Supapin use case pages.
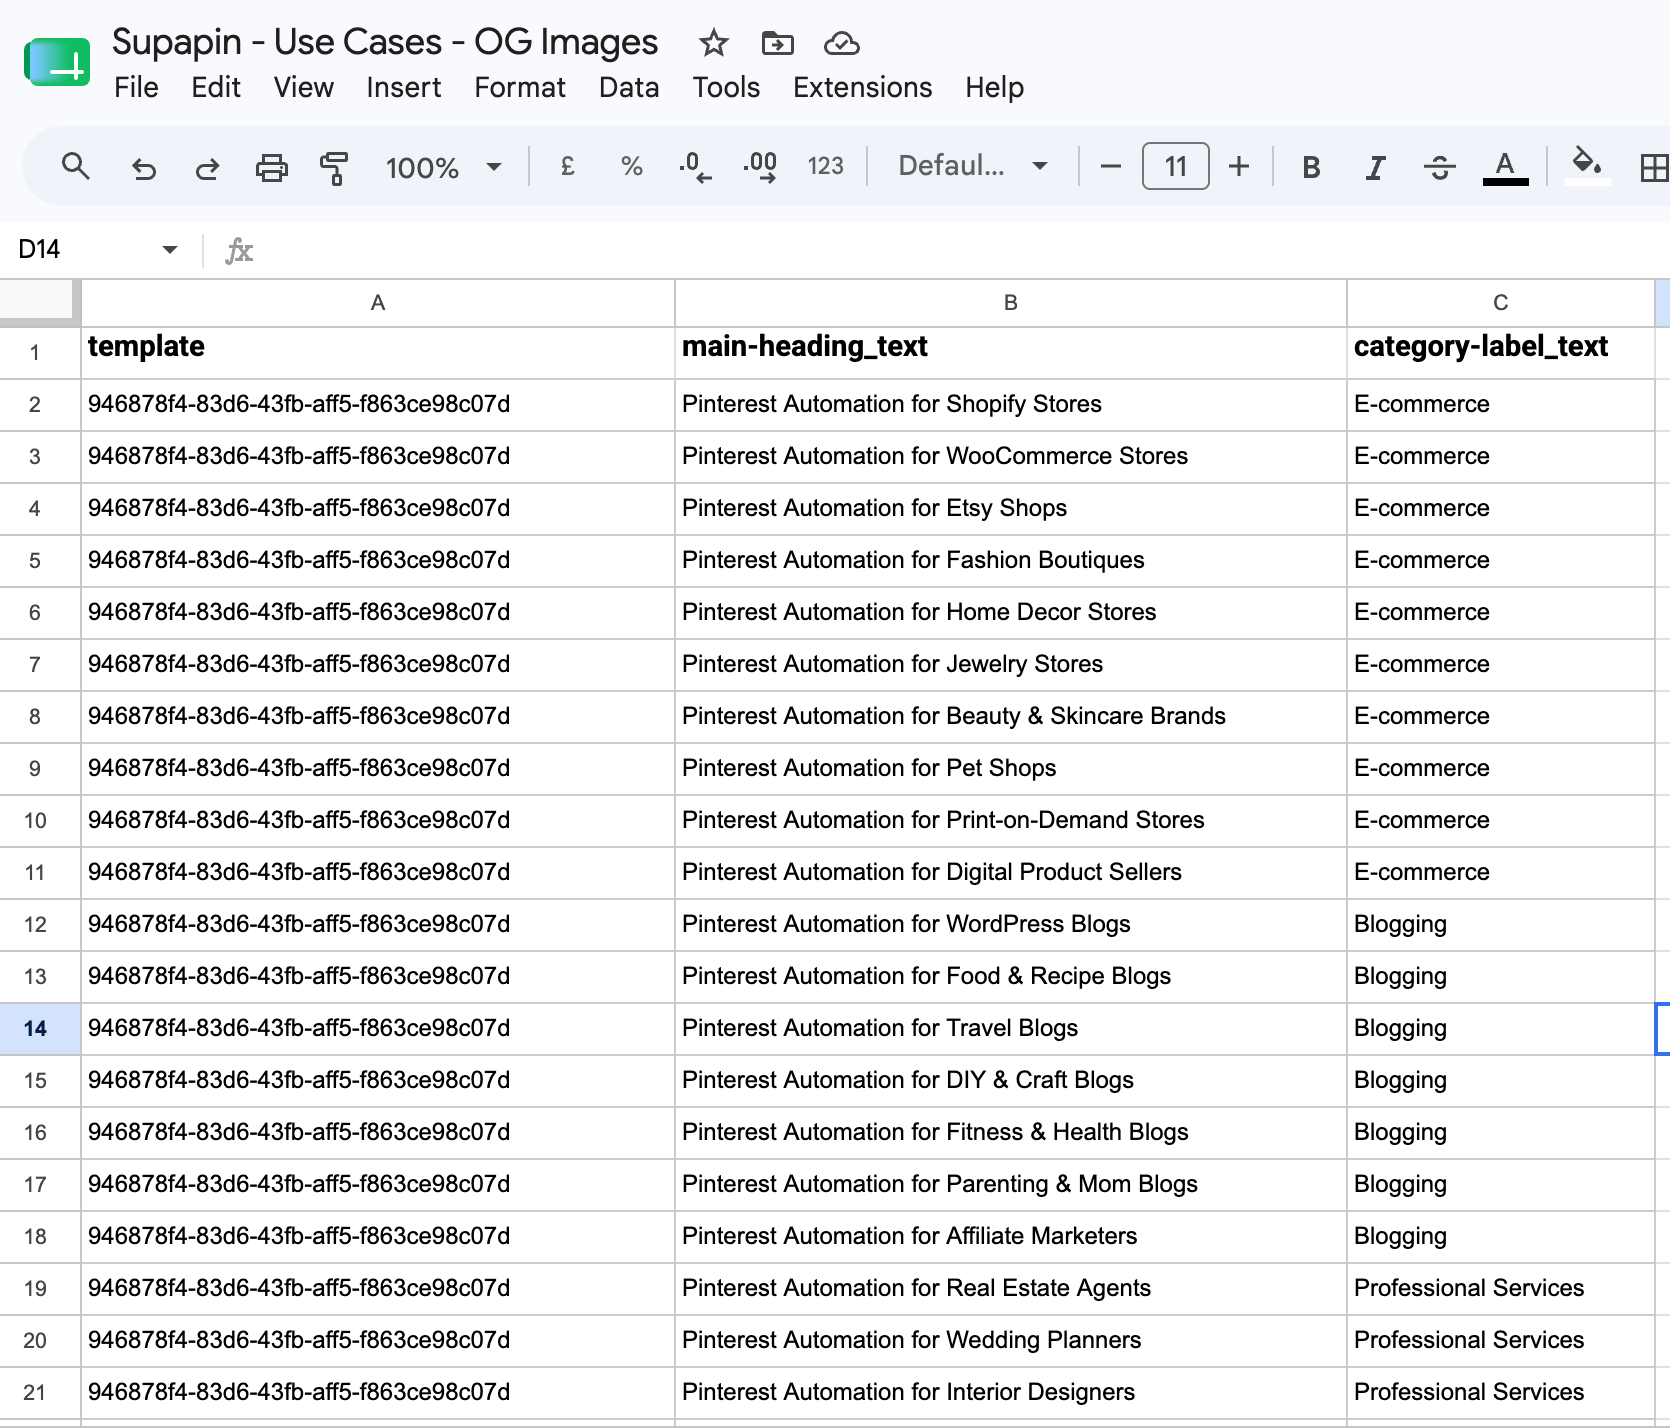
I kept it minimal because I only wanted to replace two pieces of text: the page title and the category. Everything else stays the same across every generated image.
Building the data itself was quick. I used Claude to help organize and prepare the titles in seconds. Doing that manually had taken much longer. Once the data was cleaned up, I imported the spreadsheet and added the headers according to the spreadsheet integration instructions.
The only value left to fill in was the template ID. You can find it from the My Templates page in your dashboard. Hover over or click the ID shown beneath the template you just created, copy it, and paste that same value into the template column for every row.

For most bulk generation jobs, you'll use a single template ID all the way down the sheet, exactly like I did here. If you want different rows to produce different layouts, you can also mix multiple template IDs in the same spreadsheet, and Templated will render each row with the template you've specified.
Our part is complete. We have the image and design ready. Now, we will let Templated do the hard work of automatically generating and downloading all Open Graph images to your system in less than a minute.
Step 3: Upload the Spreadsheet and Automate Image Generation
Once your spreadsheet is ready, download it from Google Sheets. Click File → Download → Microsoft Excel (.xlsx) and save it to your computer. If you prefer, you can also export it as a CSV file. Templated supports both formats, so use whichever fits your workflow.
Next, head back to Integrations → Spreadsheet Generation in the Templated dashboard. Drag the downloaded file into the upload area or click the upload box to browse for it manually.
After the upload finishes, Templated reads the spreadsheet and shows you a preview of the data it found. This is more than a simple preview. The system also validates your columns and checks that they match the expected format.
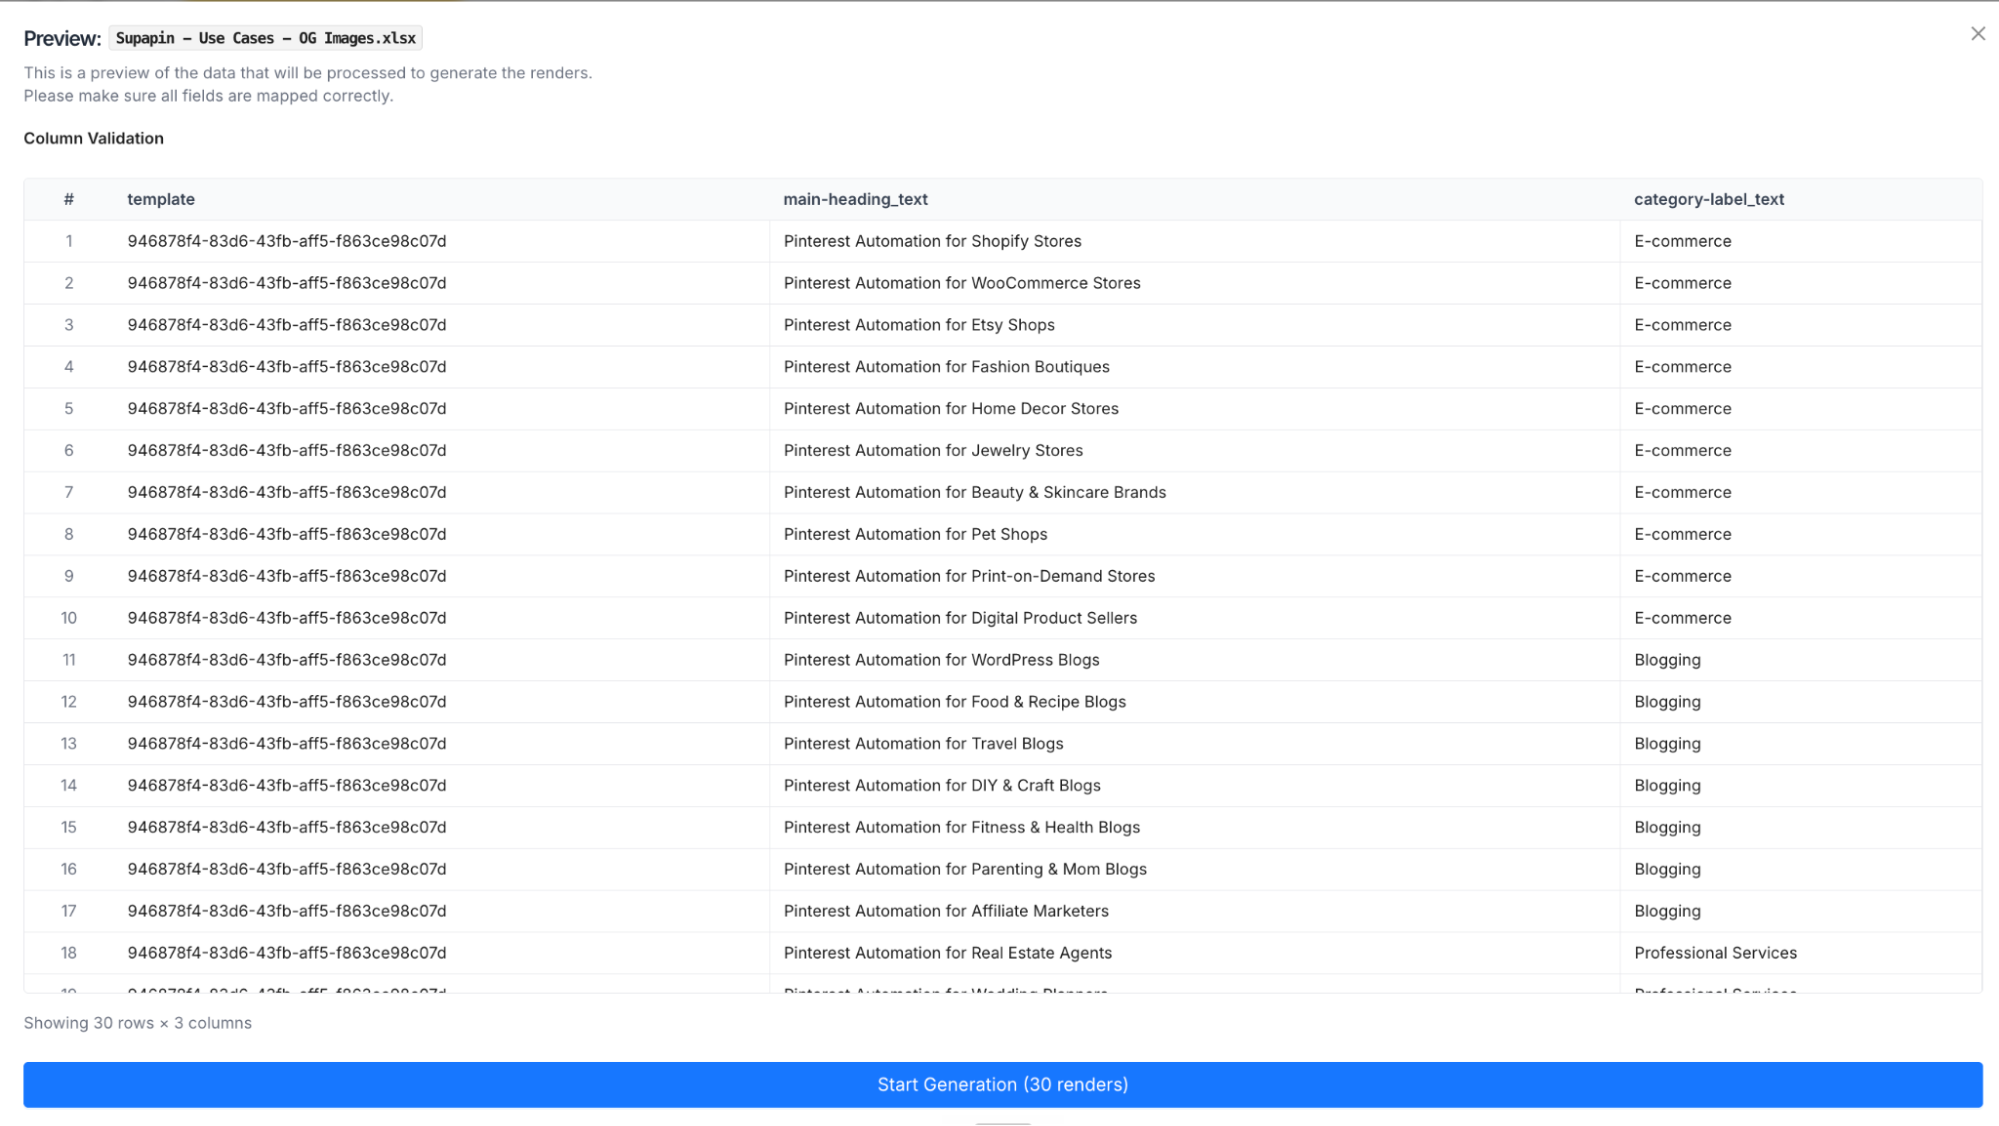
If you've accidentally misspelled a layer name, forgotten the template column, or used a header that doesn't align with the integration instructions, you'll see the problem before generation starts. And, you have to fix those issues first and upload the corrected file again.
Once everything looks correct, review the preview one last time. Confirm that the template IDs, titles, and category labels are being picked up properly and that the number of rows matches the number of images you expect to create.
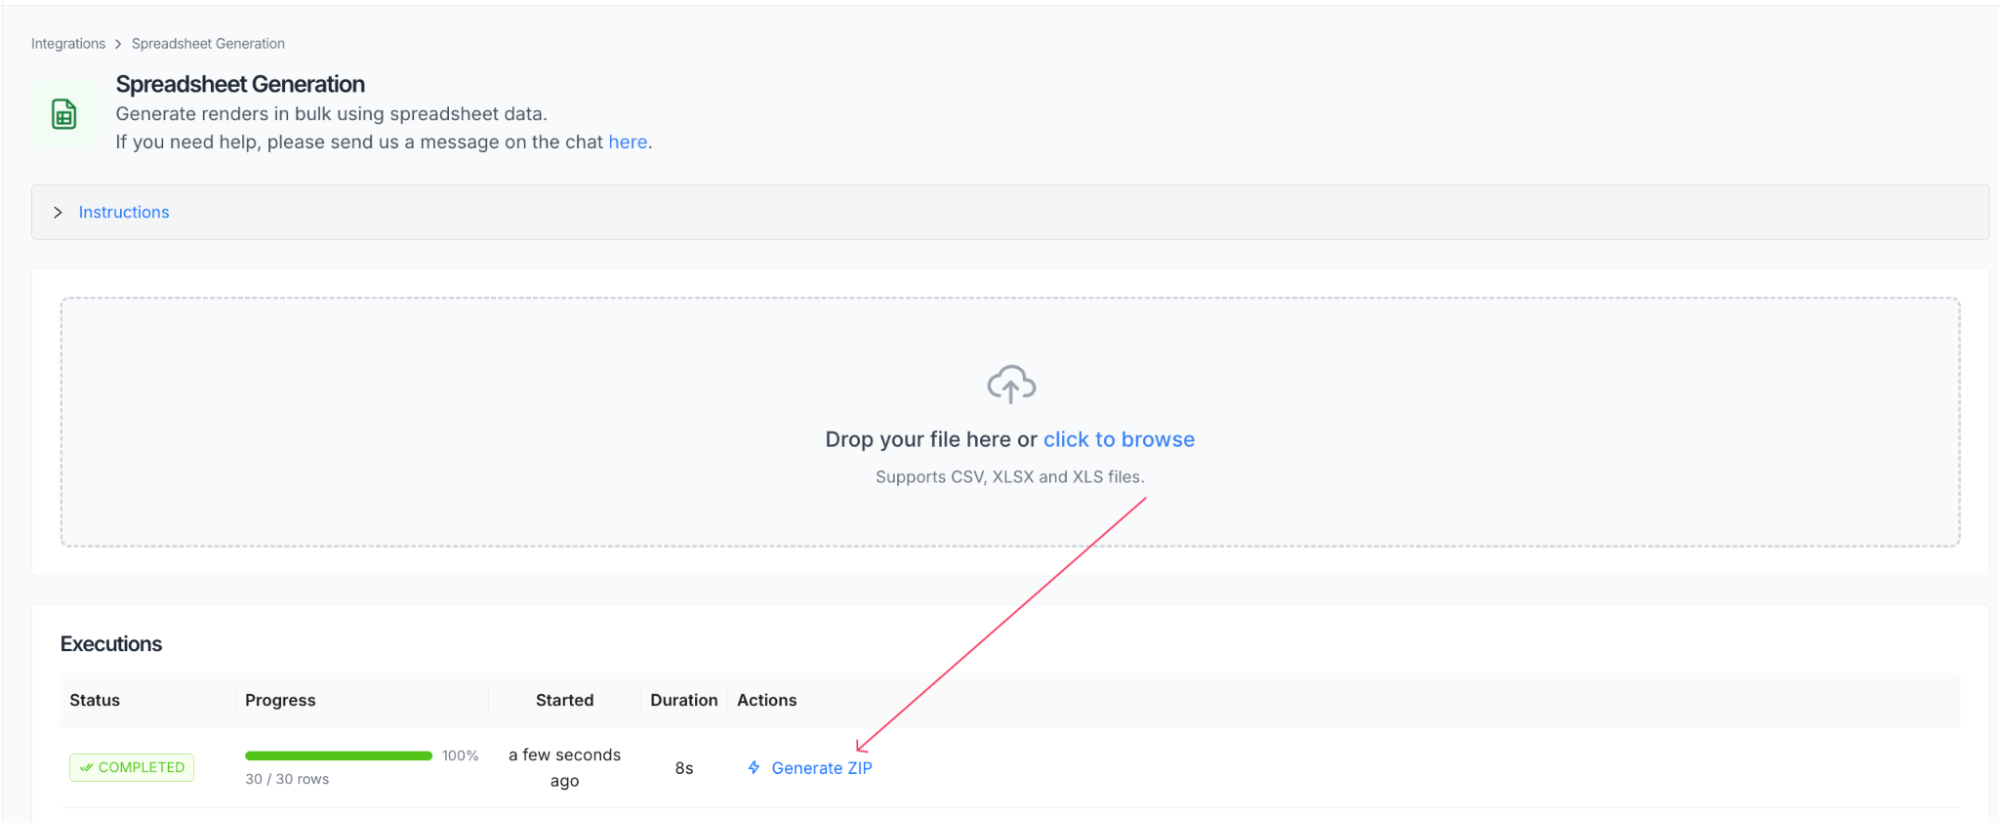
Now click Start Generation. Templated will process each row in the spreadsheet and generate an Open Graph image from your template automatically.
When the job is complete, click on generate ZIP, and all the images will be downloaded to your computer.
You should see all of your OG images waiting in the folder, ready to upload or publish
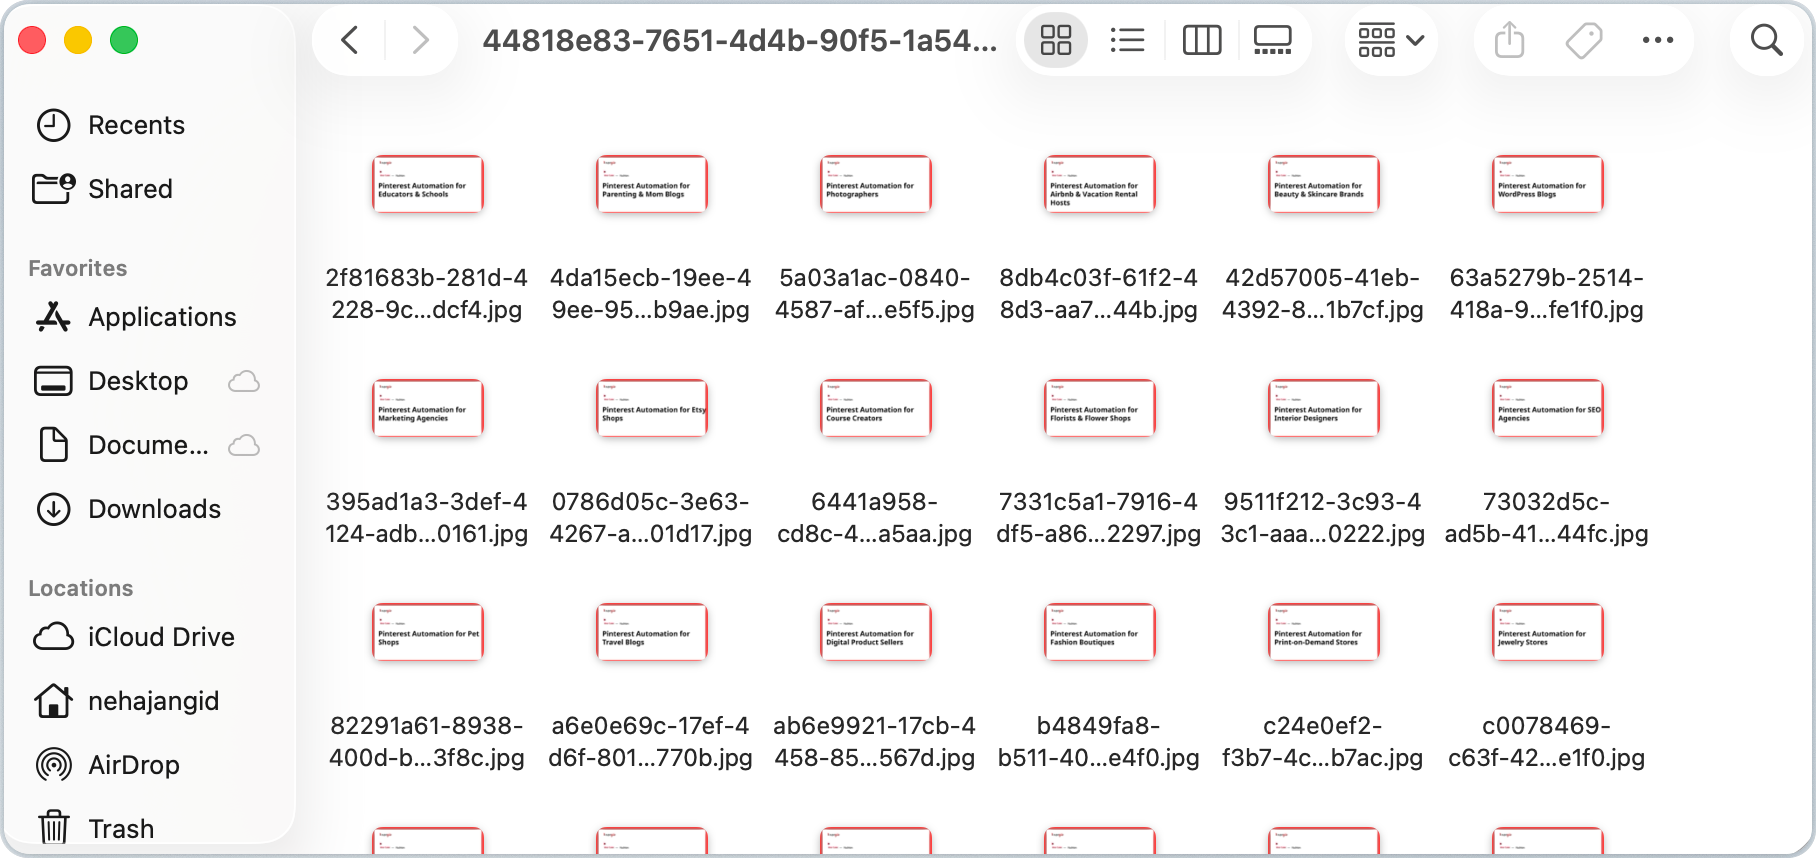
The placement is perfect in each image. Now, it's ready to be uploaded to all use case URLs.
That's the entire workflow that took less than five minutes, and the time savings become even more obvious when you're creating dozens or hundreds of OG images instead of just a handful.
Final Thoughts
Automating Open Graph images saves much more than design time. It also keeps all previews consistent, reduces manual work, and makes it practical to create images for hundreds or even thousands of pages without opening a graphics editor for each one.
That's exactly how I built the Open Graph images for Supapin. The entire workflow, from creating the template to downloading the generated images, took less than five minutes.
If you'd like to try the same approach, sign up for Templated and build your first automation. It works for everyone, coders, no-code tools users, and someone who wants quick image generation.
New accounts also get 50 free credits, so you can test the workflow without committing to the paid plan.
Additional Resources
If you'd like to explore more automation workflows and tutorials, here are a few useful resources:
https://templated.io/blog/how-to-import-canva-templates-directly-into-templated-for-automation/
https://templated.io/blog/automate-your-image-generation-using-spreadsheets/
https://templated.io/blog/automate-certificate-generation-via-templateds-built-in-dashboard/
https://templated.io/blog/automate-quote-images-for-social-media-using-templates-and-n8n/
Automate your content with Templated